
People Advanced
Employees: invitation and access
Staff do not get a “venue password” — they are invited by email and sign in with their own free account. We send the invitation, accept it from the employee's side, open her terminal, and decide what she sees.
All the points of the film 6 steps · 3:15
What you will learn
- Inviting an employee by email, with a role (Staff/Manager)
- The acceptance from the employee's side, and their “workplace”
- The staff ordering terminal (PDA)
- Access: which spaces and which request types concern them
- Role and status (Active/Inactive/Suspended)
Step by step
-
1
How it works
Left menu (second page) → Employees → “How it works”: the four-step logic on one card — add them by email, set what they can see, they sign in with their own account (there is no separate staff password), they take orders from their phone. The sign-in address and the ordering terminal are right there, ready to copy.

-
2
The invitation
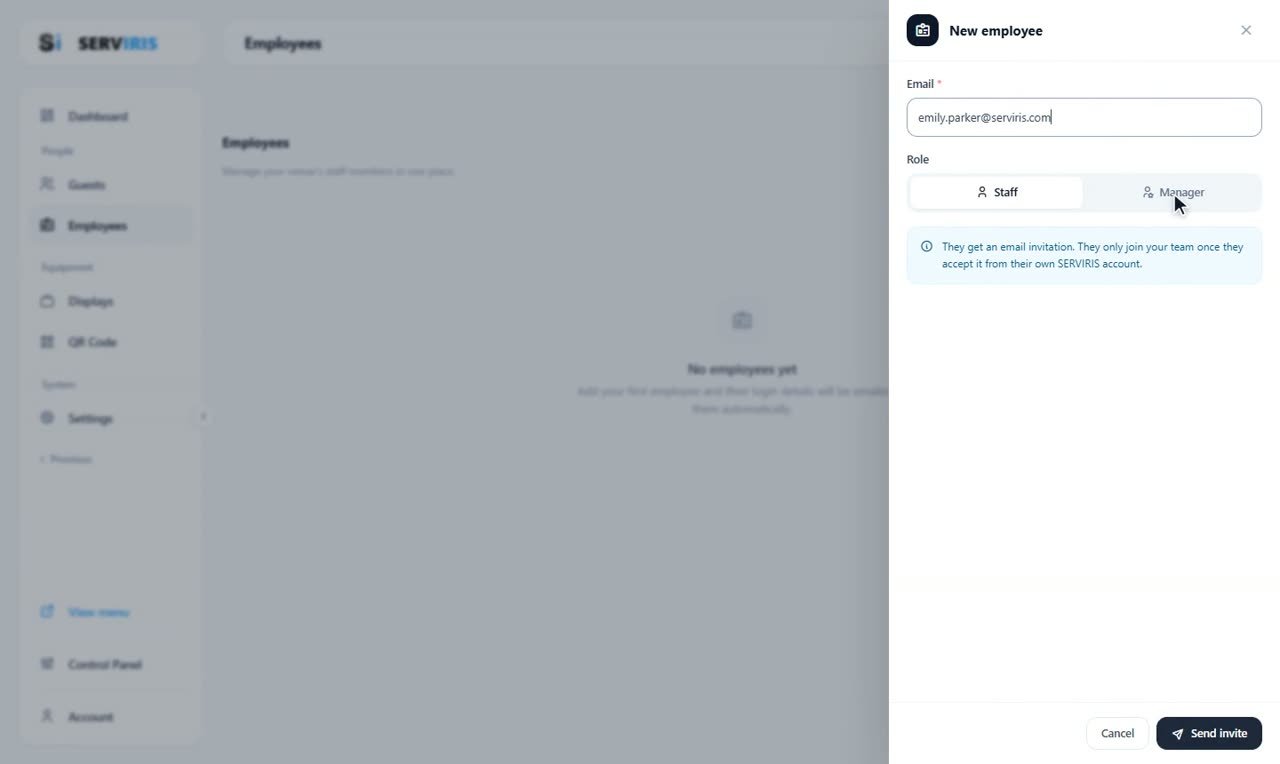
“+ New employee”: the email — emily.parker@serviris.com — and the role. Staff sees what you assign; Manager sees everything. The note says the important part: they only join your team once they accept, from their own SERVIRIS account. “Send invite”.
-
3
The acceptance
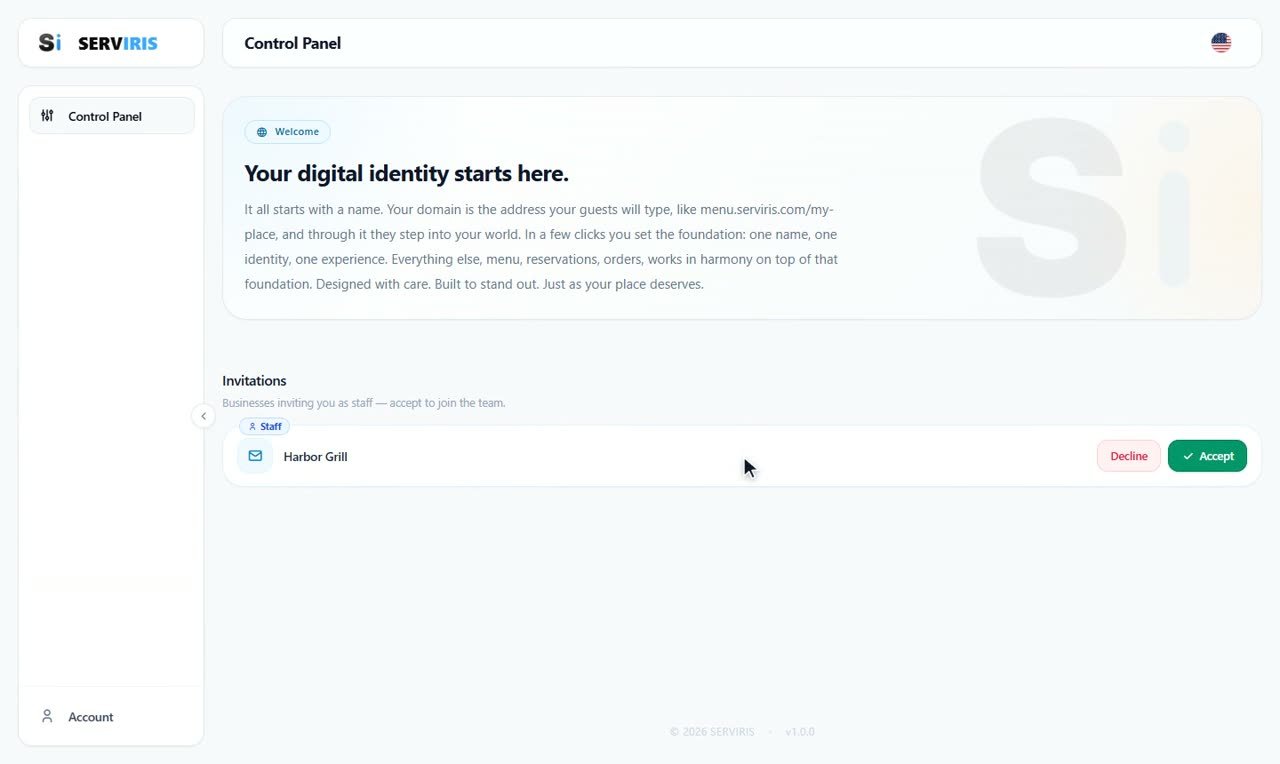
We sign out and sign in the way Emily would, with her own account. On her Control Panel an invitation waits: Harbor Grill, her role as a badge — “Decline” or “Accept”. With acceptance, the venue becomes her workplace.
-
4
Her terminal
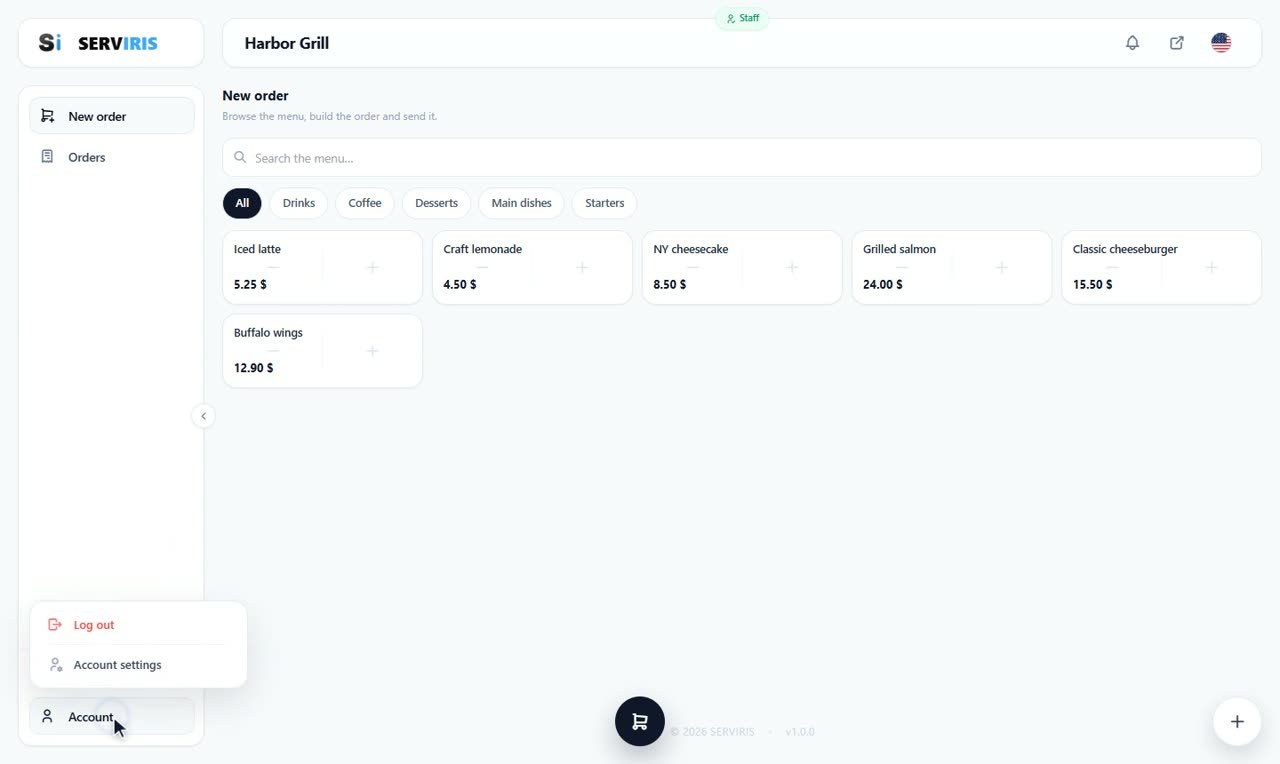
Inside: the ordering terminal, with the Harbor Grill menu in category chips, the cart, the space picker, send. This is where she takes orders from her phone — we watch it in action in the Orders lesson. Bottom left, her own menu: Account settings, Log out.
-
5
What she sees: Access
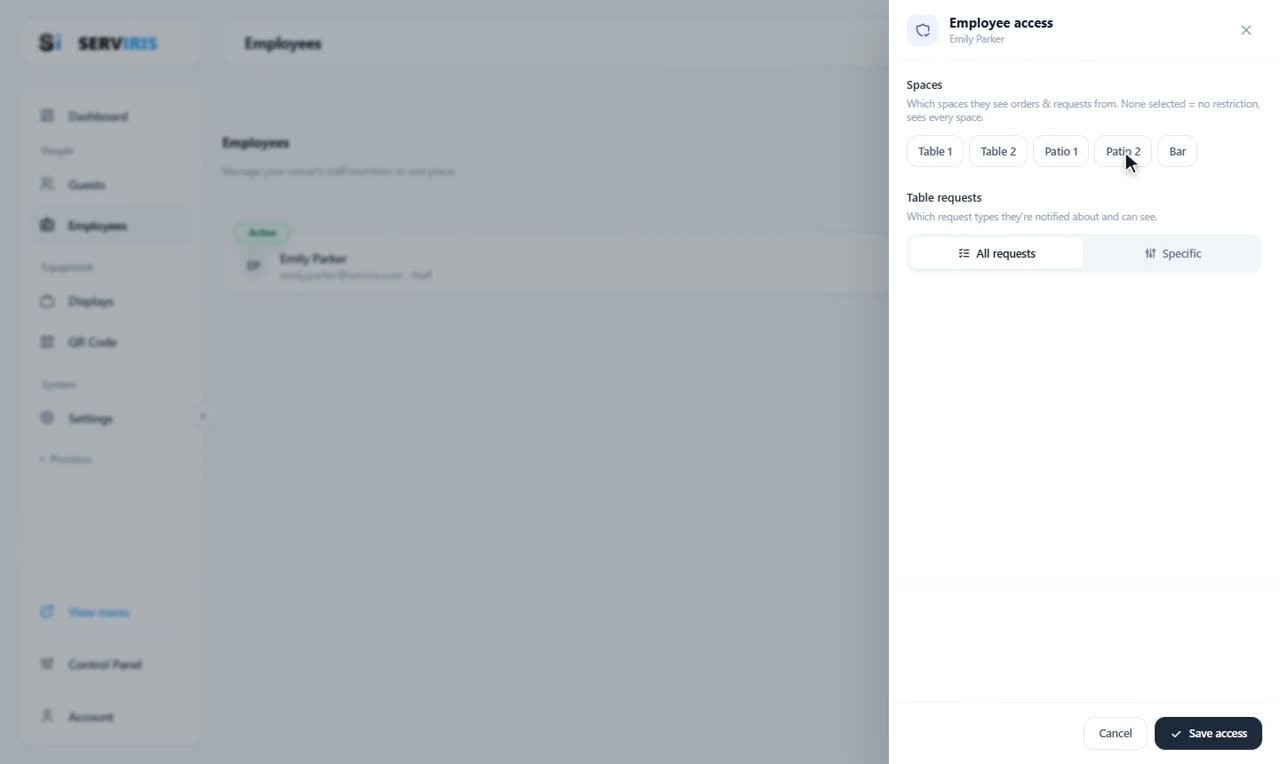
Back as the owner: on her row, “Access”. The spaces — Table 1 through the Bar; none selected means no restriction — and the table requests: all of them, or specific types. “Save access”.
-
6
Role and status
From the row's edit the role can change — the email cannot, it is hers. And the statuses: Active, Inactive, Suspended — for when someone needs a pause, not a deletion. The row keeps her whole story: name, email, role, state.

Good to know
No separate staff password: fewer secrets, nothing to “share” at the register.
The same account works at every venue that invites it — handy for seasonal staff.