
Getting started Intro
Create your account
Your SERVIRIS account is free, and it is one account for everything: your venues, the places that invite you to work, the ordering terminal. Here we create it in under a minute.
All the points of the film 4 steps · 0:44
What you will learn
- What the sign-up asks for, and what is optional
- How to pick the phone's country code
- What happens right after the account is created
Step by step
-
1
Open the sign-up page
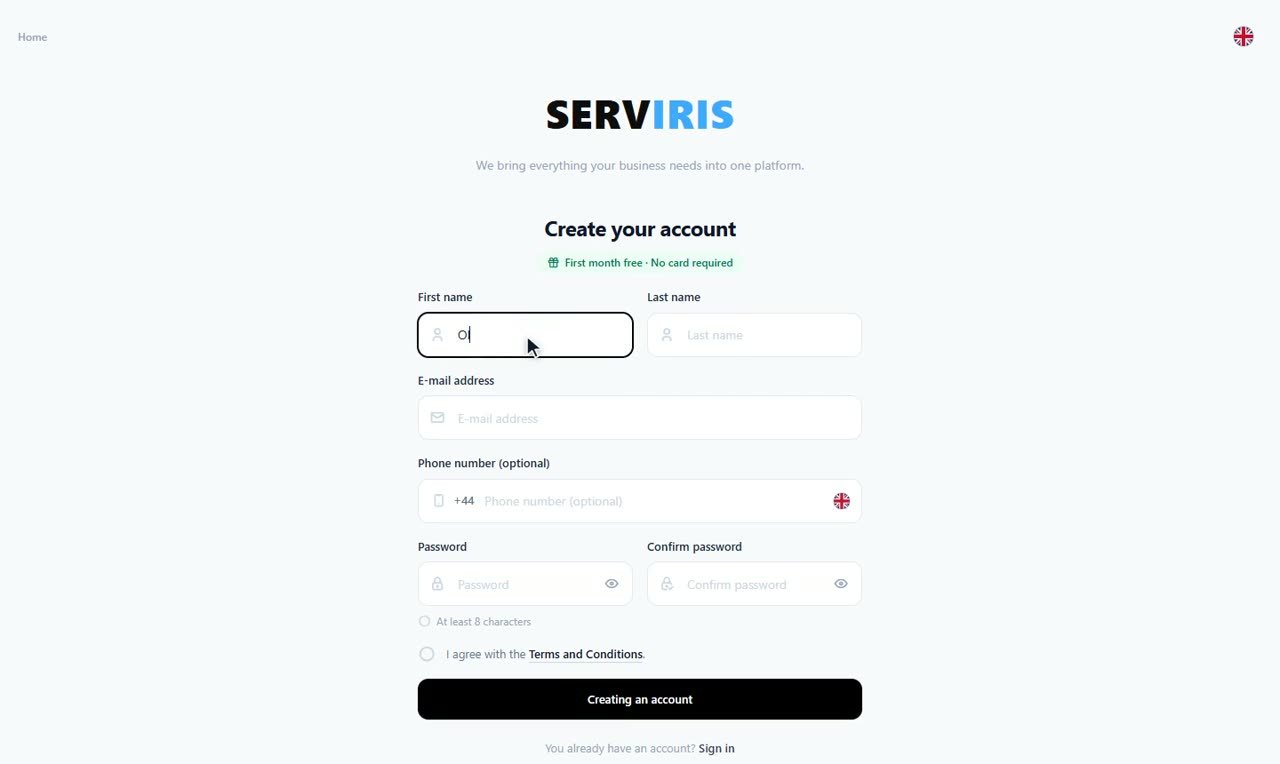
From the home page choose “Creating an account”, or go straight to app.serviris.com and pick it under the sign-in form. The green line above the form says it plainly: first month free, no card required.
-
2
Your details and password
First name, surname, e-mail — Oliver fills in his — and a password of at least 8 characters, typed twice. Your e-mail is your identity in SERVIRIS: you sign in with it, and invitations arrive at it. The phone is optional; if you add it, pick the country code from the flag first — +44 here. Tick the Terms and press “Creating an account”.

-
3
Confirm your e-mail
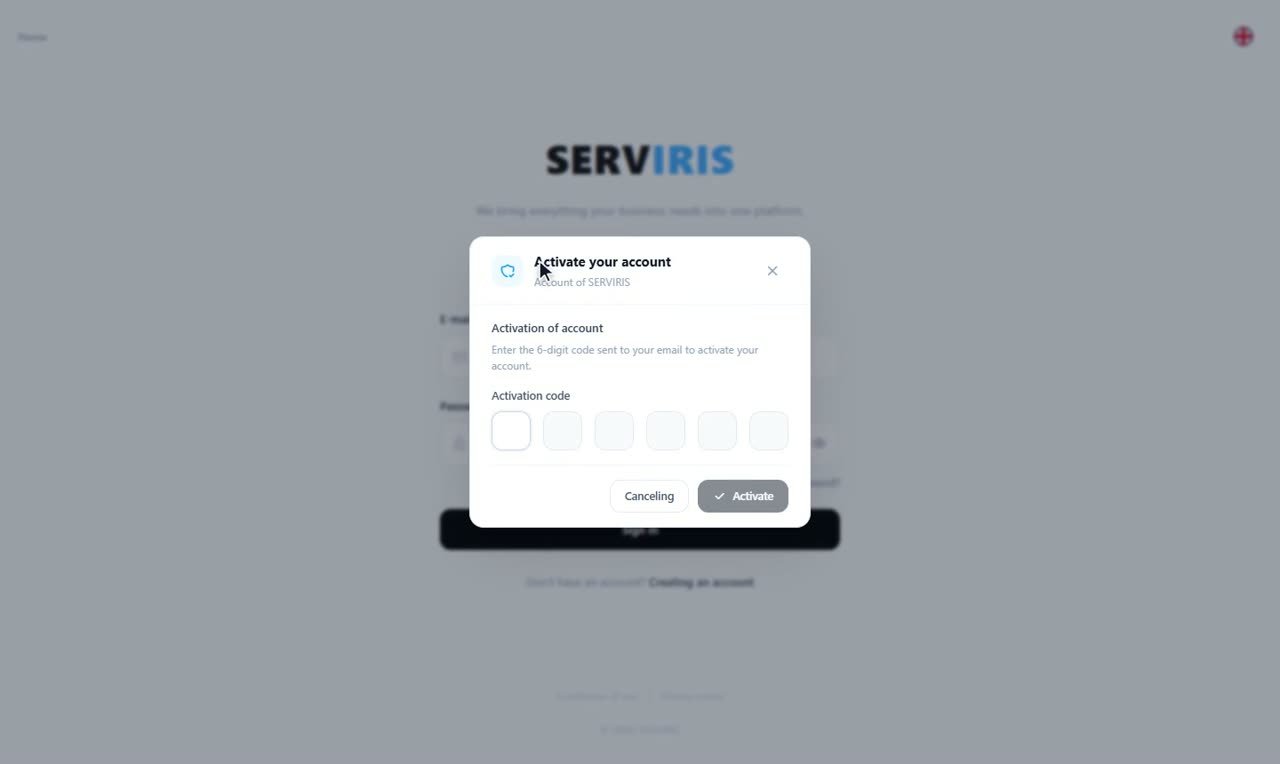
Creating the account opens the “Activate your account” window: type the 6-digit code that has just landed in your inbox and press “Activate”. That is how we know the address is yours — and that notifications will reach you.
-
4
Ready to sign in
With activation done you are taken to the sign-in page, and the message says it clearly: “Email verified successfully”. Sign in with your e-mail and password — and welcome.

Good to know
One account is enough even with several venues — every domain lives under the same account.