System Advanced
Settings: everything in one lesson
The grand tour: business identity and logo, menu languages with their translation badges, the journey across the catalog to translate what needs it, currency with a live preview, contact details and social links, and the features — who orders, where, and how they pay.
All the points of the film 7 steps · 6:18
What you will learn
- Logo and background images, and how an image is chosen
- Currency: symbol, position, decimals — with a live example
- The menu's features: what each one enables
- Menu languages, and the “needs translation” badges on products
- Order emails, social media and contact details
Step by step
-
1
The business card first
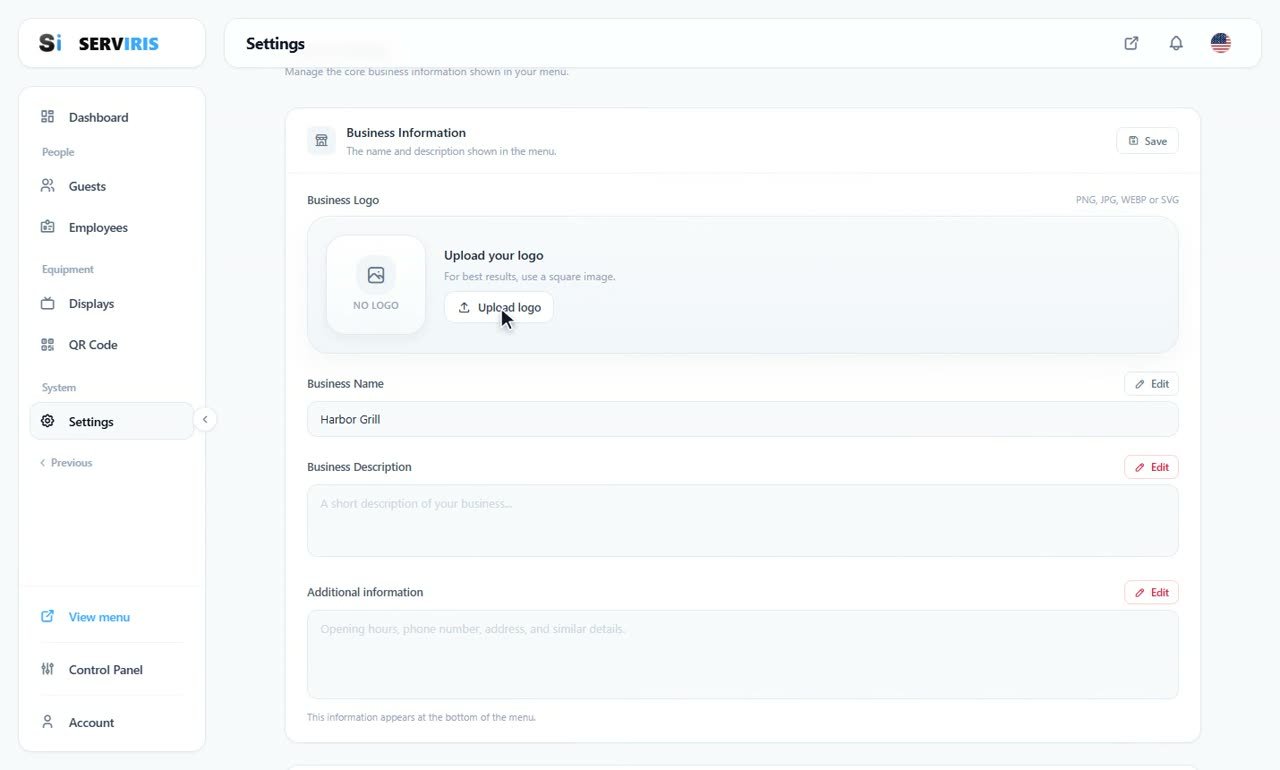
Left menu (second page) → Settings. Business Information opens the page: upload the logo — a square image works best — the business name, Harbor Grill, the short description guests see, and the additional information that appears at the bottom of the menu: hours, phone, address.
-
2
Menu languages
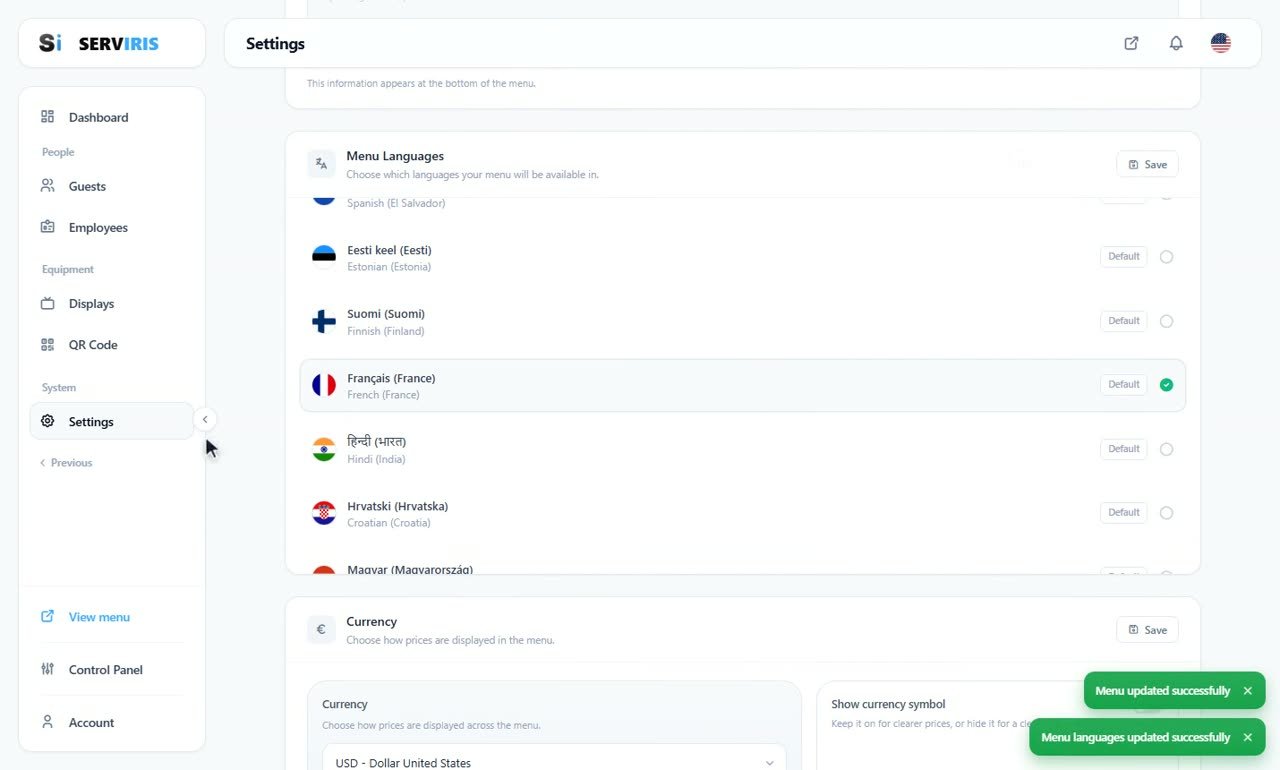
“Menu Languages” chooses which languages your menu speaks — each with its flag, one tap: French joins here, and the toast confirms it. From now on, anything untranslated will say so with two badges: “A” for the name, “≡” for the description.
-
3
The translation badges in Products
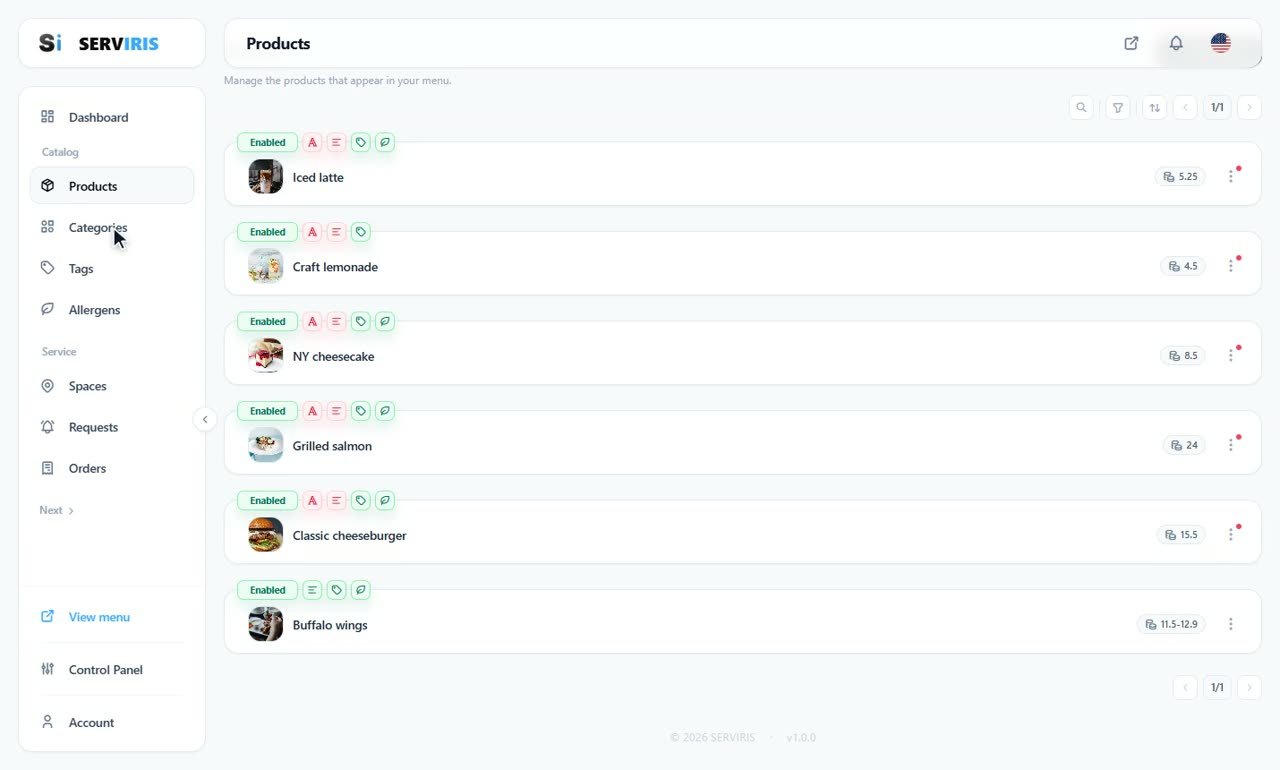
Over in Products the badges tell the truth per row: a red “A” wherever the name still lacks the new language. Buffalo wings is already clean — translate a product's name and description and its badges go quiet.
-
4
The same across the catalog
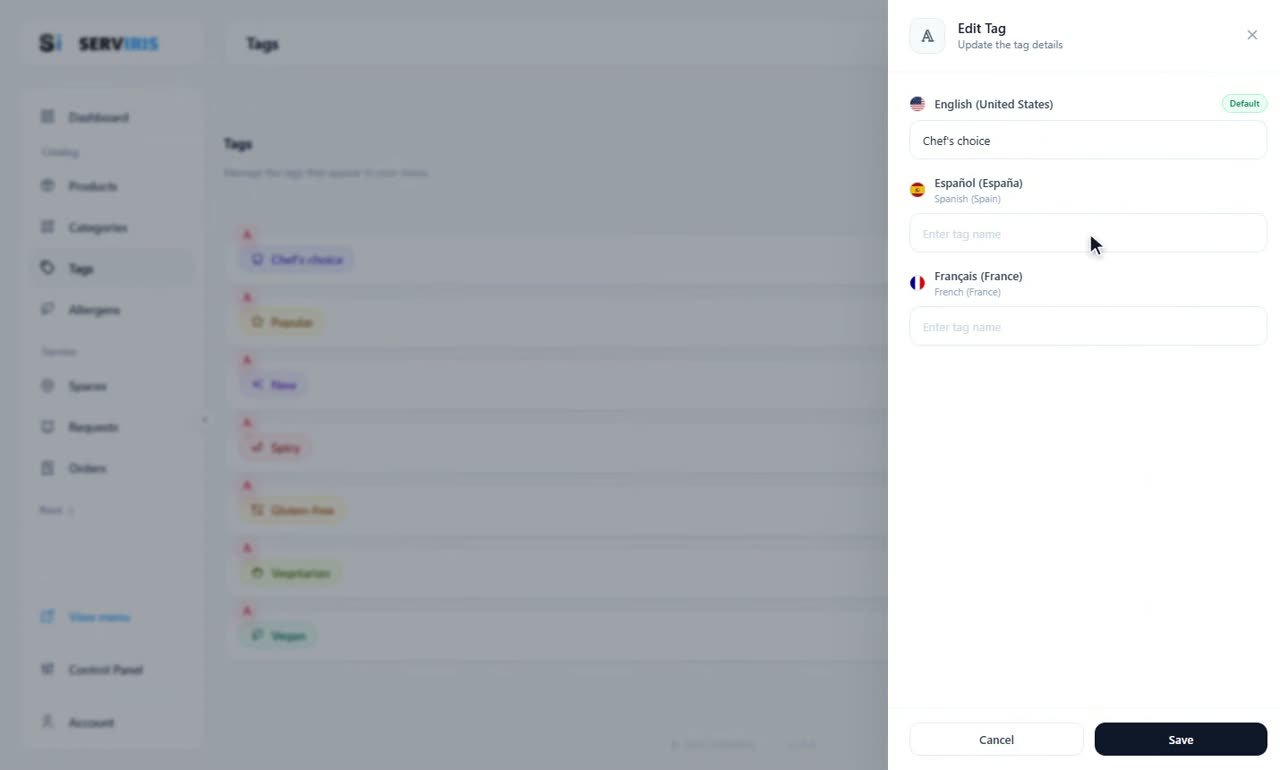
Categories, Tags, Allergens: the same journey. Here “Chef's choice” opens for editing with a field per language — English the default, Spanish and French waiting. Do one element on each page and the pattern is yours.
-
5
Currency saved, contacts next
The currency format was set with its live example repainting on every choice — the toast still says so — and Contact Information takes over: email, landline and mobile, reservation lines, WhatsApp and Viber, each phone with its country flag. The yellow note is honest: these details will be visible to your customers.

-
6
Social links, and the features begin
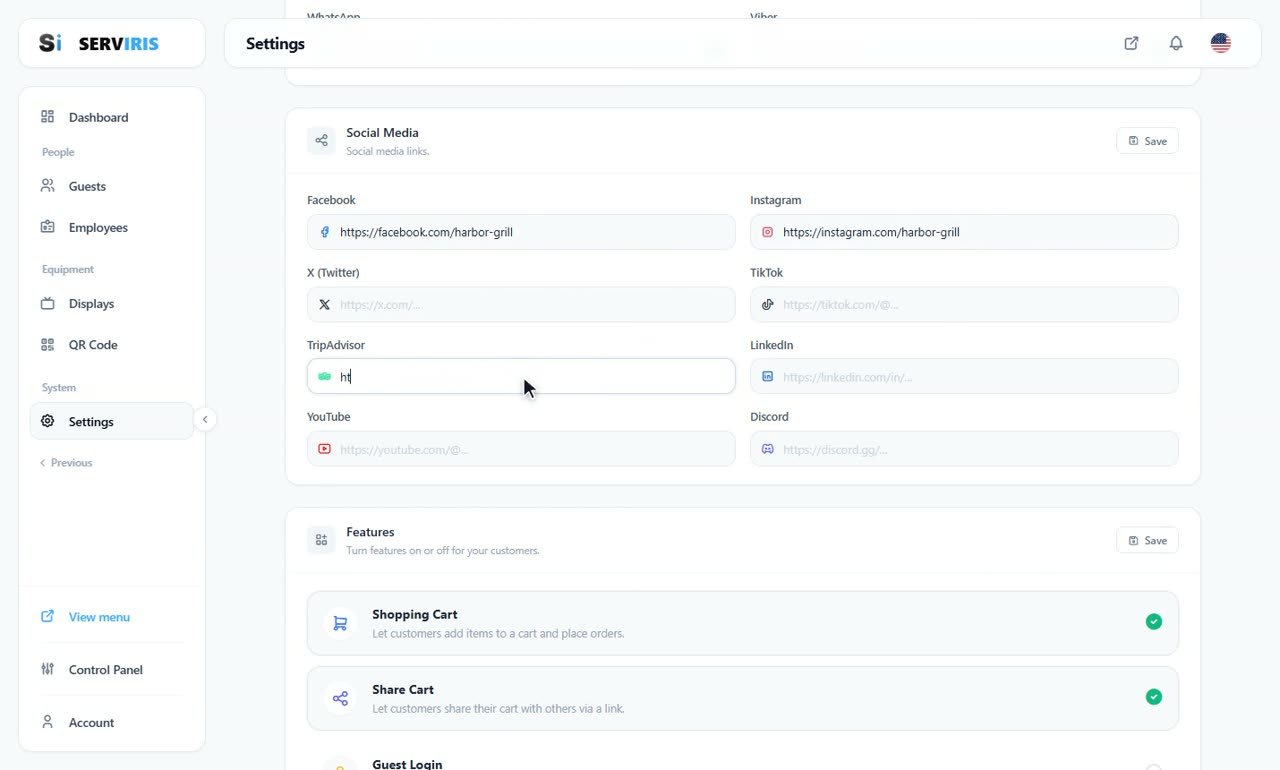
Facebook and Instagram already point at /harbor-grill; X, TikTok, TripAdvisor, LinkedIn, YouTube and Discord wait their turn. Below, the Features: Shopping Cart on — customers add items to a cart and place orders — with Share Cart beside it.
-
7
Features, one by one
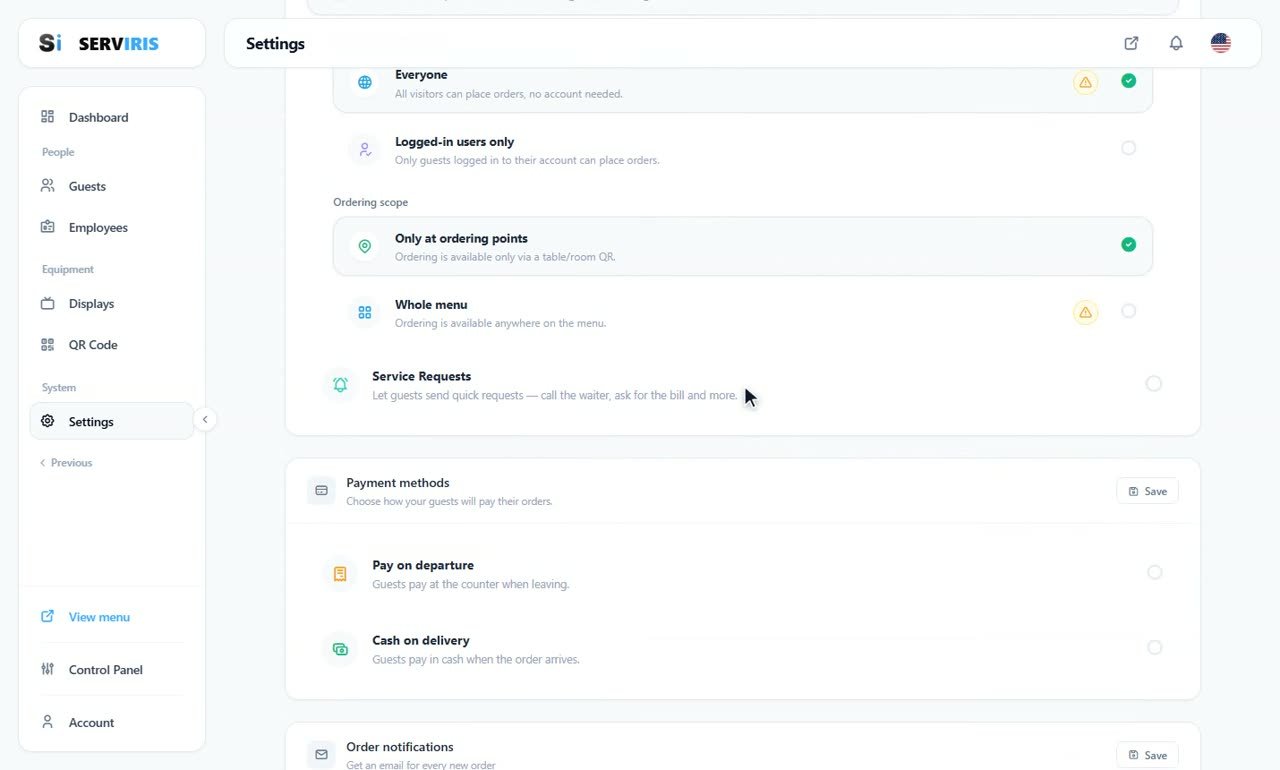
Who can order: Everyone, or logged-in users only. Where: only at ordering points — via a table or room QR — or the whole menu. Service Requests switches the table actions on; Payment methods decide how guests pay — pay on departure, cash on delivery; and Order notifications email you every new order.
Good to know
Translate names first — a guest survives an untranslated description, not an untranslated dish name.
Features you do not use stay off: a cleaner menu, fewer questions.